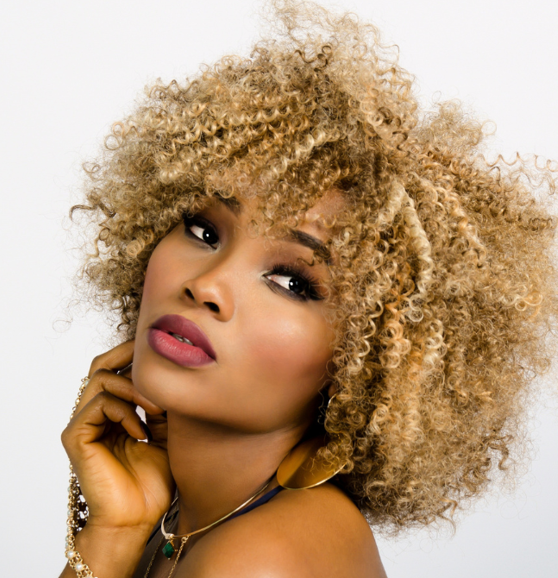
A finger coil is made by wrapping your hair (in small amounts at a time) around the finger. The results will give you lots of tight and bouncy coils hanging from your head. The feeling you get from them will amaze you.
They are going to look as if they were done by a professional, and your hair will be full of volume. The main key for you to have amazing results is for you to have patience and treat your hair with respect!
Source: Style Canada
How to Get Finger Coils
What You Will Need:
- Wide-toothed comb
- Curl enhancing cream
- Hair clips
- Rat-tail comb
- Hairspray
- Blow dryer w/ diffuser
- Spray bottle w/ water (optional)
Preparing Your Hair for Finger Coils
Shampoo
Use sulfate-free shampoo & conditioner and cleanse hair; this helps to lock in moisture. On the days that you don’t have a lot of time, just dampen those coils with a little spritz of water (maybe you could carry a small spray bottle in your handbag). Of course, you don’t want your hair to be dripping wet.
Condition
You can use a conditioner that doesn’t consist of rinsing out, and it will help to keep your hair smooth and detangled. But you should choose a conditioner that is chemical-free for that much-needed nourishment, applying it to your hair when it is wet for the best results.
Comb
Using a comb or brush either works as long as it says wide tooth on it; this is for getting all the tangles out of your hair prior to starting the coils. Detangling is an important part of the process, as it helps keep the ends of your hair smooth and frizz-free.
The easiest way to do this is to begin at the tips/ends of the hair, and as each section has been combed, you will move up s little, slowly making it to the scalp.
Separate Into Sections
Using a rat-tail comb and clips, clip those sections on top of the head/crown. Now divide those lower sections into more sections (how many depends on how thin you want them to be).
Use Curl-Enhancing Cream
You will need to apply a curl enhancer gel or cream (setting lotion will also work) onto each of the different sections. Gently rub it into the hair from the roots down to the tip/end of each section on both the front side and the backside. You can use a comb or brush for the cream or gel in order to distribute it thoroughly through the hair.
11 Best Products for Finger Coils
- No Frizz Nourishing Styling Cream
- Ampro Vitamin E Oil
- Eco Styler Gel
- Blueberry Bliss Repair and Grow Curl Sculpting Mousse
- Shine n’ Jam Black Castor Flaxseed Oil Styler
- Luscious Curl Cream with Flaxseed Oil
- Miracle Curls: Curl Refresher Spray
- Aragon Oil
- Botanical Boost Curl Energizing & Refreshing Spray
- The Guardian Curl Refresher
- Curl Pre-style/Re-Style Primer
Creating The Finger Coils
You can choose small or larger sections of hair; it just depends on the length and its density. Take small 1-inch sections of your hair and you are going to twirl it around with your fingers, starting at the roots and all the way down. Alternate the direction of the twirling so they will have a natural look to them. Continue the same process until you have coiled all of your hair. The time it takes depends on the length and density of your hair.
Use a diffuser for blow drying your hair, as it will help in maintaining your curl pattern. Remember to use refreshing curl spray to eliminate frizz. If you want to dry hair faster, you can use a hooded dryer. Make certain that the coils have dried completely prior to styling or separating them.
Finger Coils on 4c Hair
- Use some curl-defining shampoo to cleanse your hair in order to get all the oils, impurities, and grime out.
- Apply one of those leave-in hair masks; this will keep the curls hydrated and nourished.
- Get a leave-in conditioner to use for extra nourishment and moisture; this is beneficial for your locks.
- Put on and wear a shower cap for 20 minutes.
- Now you need to part your hair in small sections. Spritz it with water, now spread the curl enhancer gel, then comb it throughout your hair.
- Grab 1-inch of your hair and begin twisting it at the root and do this all the way to the ends.
- You are going to be repeating this by separating every one of the sections horizontally.
Natural Long Hair Finger Coils
- After shampooing your long natural hair, you will need to towel dry thoroughly.
- Now you need to divide that long hair into sections and make a knot on top of your head/crown with your hair.
- Separate each of the sections with a rat-tail comb, and then put a leave-in conditioner on to give the hair extra softness and moisture.
- Now comb your hair to get any knots it may have out.
- Each of the sections will now need some curl enhancer; gel or cream will work.
- Begin finger coiling, starting at the roots and working your way down to the ends/tips, and repeat on every section.
Finger Coils Ideas
Finger Coils on Natural Short Hair
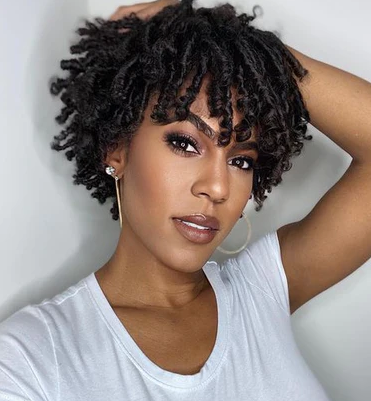
Source: Miche Beauty
Finger Coils on Long Hair

Source: NaturAll Club
Finger Coils on Transitioning Hair
Finger Coils on 4c Hair


