Nowadays, glitter is put in hair for appearance, just like shimmering eyeshadow. Adding a little sparkle to our looks has become a trend. In addition to that, people are now wearing rhinestone makeup. However, wearing rhinestones in today’s world should be no surprise! Whether it is the rhinestone eye makeup or just to have the rhinestone makeup look, or maybe simply trying to enhance the sparkle they already have.
When a protection mask is a requirement, it was popular to put a few gems about the eyebrows to get an awesome photo to post on Instagram. It just feels right these days to wear the simple rhinestone makeup look or just some simple rhinestone eye makeup for almost any occasion or event. Of course, it’s not easy holding the rhinestones in place, and this article will help out with that issue.
The following “steps” will help in applying rhinestones to the face, including a variety of ways to incorporate them for your own look.
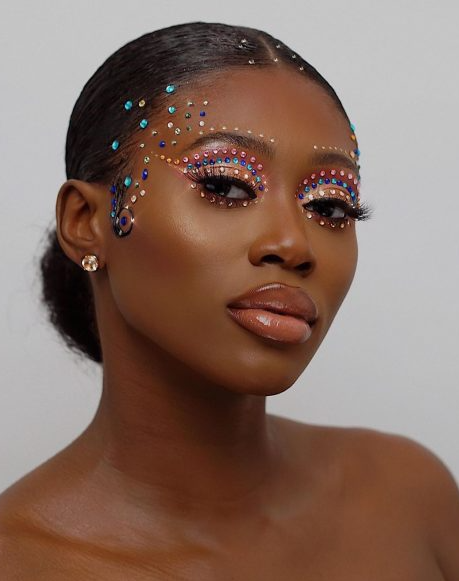
Source: Guardian
Step 1: The Tools

Source: Glamour
Prior to getting started on adhering rhinestones to enhance your facial beauty, it’s crucial to have all the products handy and set up that is going to be needed. Yep, convenience is what it’s about! If you have a vanity, get it ready, if you do not, then you need to get the bathroom counter ready by having a piece of scrap paper, the adhesive used with makeup, and tweezers, and now you will need the gems that you have already picked out!
Step 2: Choosing the Glue

Source: Makeup.com
Whether you’re creating rhinestone eye makeup with pre-adhered adhesive or creating with gems that come pre-adhered, you also are going to need some skin-friendly glue for keeping in place (the glue used for eyelashes works too). If, for some strange reason, eyelash glue will not work, get some spirit gum (the kind that comes with glue).
Step 3: Prepare the Area

Source: La Belle Society
It is a necessity to use a clean, dry area to get rhinestones to adhere. You can apply NYX Professional Matte Setting Spray prior to applying a gem or rhinestone, and another way is to use a cotton swab dipped in micellar water and clean all the areas where the gem or rhinestone will be placed to get that simple rhinestone makeup look.
Step 4: Applying Adhesive

Source: La Belle Society
Squeeze just a little of the adhesive onto the paper. Remember that the adhesive should be formulated specifically to use with cosmetics. Just because you want something that is not likely to cause skin irritation. Also, the rhinestones will stay on longer the stronger the adhesive.
Step 5: Placing the Rhinestone Makeup
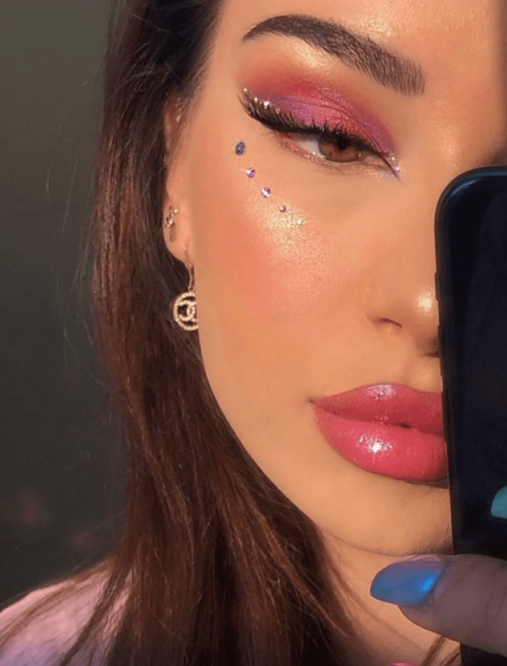
Source: Pinterest
Carefully pick up the gem you have selected with the tweezers. It helps to have a photo of the look you seek. Unless you have a good idea of what you are looking for with the rhinestone makeup. Furthermore, it’s wise to stand a photo (perhaps off your phone) next to a mirror to use as reference.
Next, take the rhinestone and dip it into that glue on the paper, and put it wherever you want it. Maybe hold it down for several seconds, making certain it is going to stick. Simply repeat dipping the gems into the glue and putting them on until you have a rhinestone makeup look.
Step 6: Removing the Rhinestones
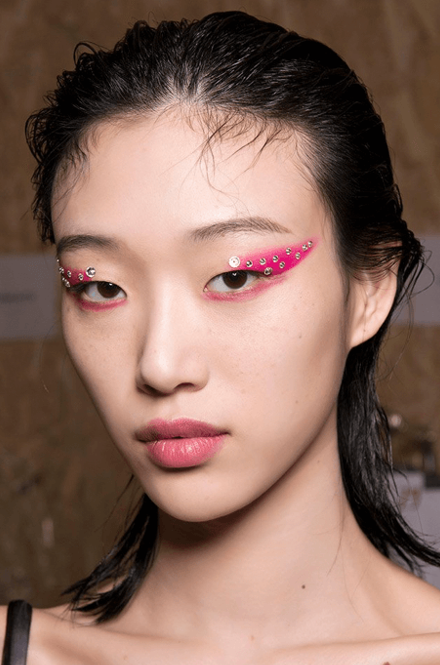
Source: Pinterest
If eyelash glue was used to apply the gems, you’re in luck because makeup will take them off easily, and by the way, the Garnier SkinActive Micellar Cleansing Water with Hyaluronic Acid + Aloe. For the best results, use the remover that comes with it.


